


I saw a picture on the internet and was so inspired by it. I'd surely love to thank the creator whoever you are! I don't know if that project was a box or not, but I knew once I saw it what mine would be and I hurriedly started figuring out how I was going to do it. As I accidently published this before it was time yesterday evening and had to quickly remove it, I'm certain some of you have already gotten a "sneak" peek of it... well, now you get to see it in all it's grandeur!!! I haven't had the time to do a cut.file for this project yet, so relax and get ready for me to show you how I did it by hand. The procedures are really easy but the step-by-step tutorial is rather lengthy, so let's get started. Here's the box and you'll see at the end of the tutorial it's really a double box which will hold 2 treats:

I started by assembling all the pieces I would need. The first being the 2 boxes which form the Body of the piano box. I measured and cut the 2 bases and 2 lids from black cardstock as follows:
Wide box base paper size = 8.50" x 7"
Wide box lid paper size = 7 1/8" x 6 1/8"
Narrow box base paper size = 8" x 5"
Narrowr box lid paper size = 7 1/8" x 4 1/8"
I scored each base 1" on all 4 sides and scored each lid 1/2" on all 4 sides. This is what I had:

I snipped between the middle of each box corner, up to the intersecting corner score line, to form the fold tabs for the boxes:

After doing this on all the box corners of both bases and lids, I cut away the inside tabs from each corner fold tab, leaving only the outside tabs:

Once all the inside box corner tabs were cut out on both bases and lids, I bonefolded along all the score lines:

I glued tabs inside the folds of the bases and the lids to form my 2 boxes. I put these boxes to the side to move on to the next procedure, which is the Keyboard:
Keyboard paper size = 6.25" x 3" (white cardstock paper).
After measuring and cutting out paper size for the keyboard, I scored it at 1/2" intervals across the 6.25" top side of the paper with a black pen (you can also use a black felt narrow tip marker). The black scoring lines form the White Piano Keys. It looked like this:

Next, I did the Black Piano Keys by measuring out a strip of black cardstock at 1/2" x 8 1/2". I folded the strip in half lenthwise and then in half again. I now have 4 equal sections:

I cut and separate each section, and fold each of the individual sections in half again:

I next cut each of these folded sections apart to give me the 8 black piana keys needed. I put these aside and continued on to the next steps.
NOTE: Please read carefully from here on to avoid using the box base for the box lid and/or vice-versa; I've underscored the box parts to help clarify you don't mistake them. Okay, I'm going to grab the wide box lid and the white cardstock paper keyboard. I glue the white keyboard cardstock to the top of this wide box lid close to and along one edge of the lid (lengthwise) to look like this:

Next I grab the Narrow box base and glue it along the back of the Wide box lid; it'll look like this:

Now, I'm going to take my 8 black keys and glue them as evenly as possible, aligning them up against the front of the Narrow box lid and to the middle of each black scoreline on the white keyboard cardstock; alternating them by using 2 black keys then skipping a black line and next using 3 black keys and skipping a black scoreline until it looks like this:

Phew! I'm almost there! Now I'll make the Legs for the piano box! I took 2 toilet tissue rolls and cut each roll evenly in half to form 4 rolls. As I only use 3 of the rolls, I discarded one section. I then covered the 3 remaining sections with black cardstock; like this:

Now I'll glue the legs onto the bottom of the piano base, which is the Wide box base, by gluing one leg onto each front corner and the last leg to the middle back section of the box base. It'll look like this:

All right!!! The last procedure to making this box, before decorating it, is to add the piano lid. (if you'd like to have a copy to print out, I have a .PDF file available for this lid on my blog at the end of this tutorial there. You can click on my name at the top of this post to be directed to my blog). Okay, finally all I had to do was cut out the lid and glue the straight edge of the lid to the top of the smaller box lid aligned with and along the front edge of the Narrow box lid. See the pictures below for examples:


Now add the lids to their box bases and our double treat box is done! See, all it really is is gluing 2 boxes together -- a narrower one of top of a wider one. Now it's time to decorate! I traded out the black lid for the white one on my completed box and stamped it with the sentiment "all you need is love". The music notes and the word "Love" are stickers. Lastly I added a sticker heart to some small paper flowers from a small bunch I bought at Michaels for 99 cents and glued them to the lid, and up one of the legs on the front of the box; added a black velvet bow to the roses and all done! Now, you can design your own! Oh, and don't forget to let me see it when you do!
Here is a picture of the box open to display the inside of the narrow compartment treat box ( I used a popsicle stick to prop it open):
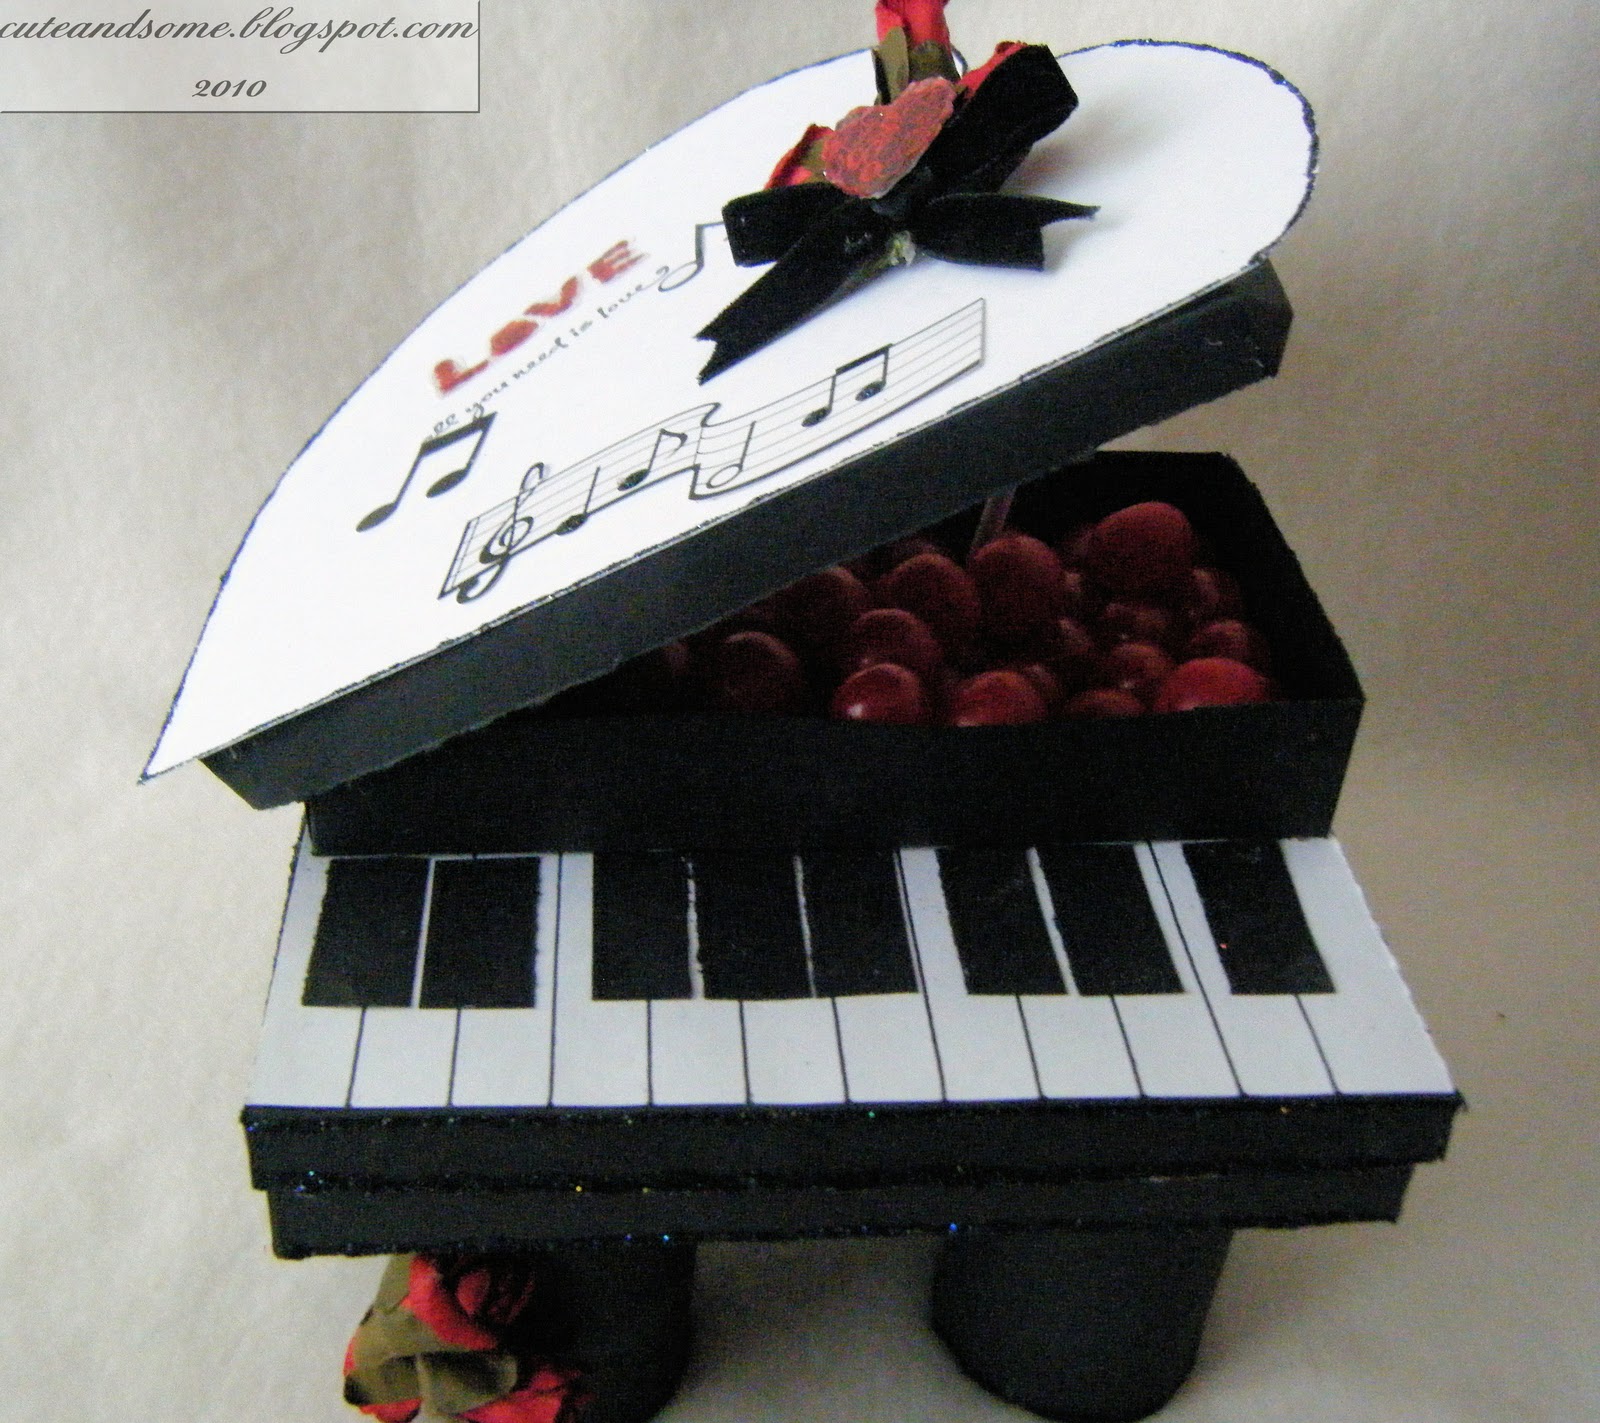
Here's a picture of both boxes open to reveal both treat box (narrow and wide) compartments:

How cute is this?!!! I really hope you like it!!!
See you next month!


23 comments:
Nice job..this is really cute.
http://iwycd.blogspot.com/
Audrey,
Super nice project
Thanks for sharing
Hugs
Stacy
Audrey, this is WONDERFUL! Love this double treat box! What a cute little gift this will make for some lucky person... although I think it is so cute I would have to keep it!!! Great tutorial. Thanks so much for joining us today here at Shes A Sassy Lady!
This is an awesome double decker treat box!! I agree with Sheila....I would want to keep it too!!
Wow!! This is an amazing project!! I absolutely love it!!!
Oh Audrey you never cease to amaze me. AND as always you make it look so easy to do. Thank you for sharing your awesome talent. hugs
you never cease to amaze me with your creations. This piano box is lovely.
Hope you work on the cut file or gypsy file for us club fingered people when it comes to scissors. :)
OH MY GOSH!!! That is so SUPER DUPER NEAT!!!
Thanks for sharing the directions. I'm going to try and make one.
Oh my gosh - Audrey this is fantastic! What a great treat-box and a piano to boot! Love it!
Hugs,
M
What an incredible project you made! It's just wonderful. What a lucky person the recipient is!
OMG!!!! This is absolutely incredible Audrey! I love every single thing about it!!! I just don't know what else to day! LOVE IT!!!
This is FABULOUS! My niece plays the piano, this would be a nice treat box for her. Thank you for the tutorial.
Hi, everyone! I am so glad you like this project. I so enjoyed making it and having it to share with you all today!
Thank you for your wonderful comments!
Audrey, This is so great!! Love it.
What an adorable idea! I'm with the other gals ... I'd be keeping it for myself as well! Thanks for sharing your talent!!
WOW!!!!! Great box!!
Audrey, This box is Awesome! Great job my friend. Shari (cricutrookie)
this is great! you are the QUEEN of CREATIVITY!!!!
Hope you are doing great with all the snow!
OMGoodness Audrey this is absolutely incredible!!! you are so frek... I mean talented!
Love it!!!
Gaby
This is a wonderful little treat for sure! A feast for the eye and for the body! TFS
Holy cow!
Super treat box...love, love, love it.
Your pics and directions are so good.
Absolutely will make one.
Thank you.
PJ(Jessie Adams)
Super Awesome Job !!! very creative TFS!!!
Well how cute is that!!!! I love it!
Post a Comment