


Hi all,
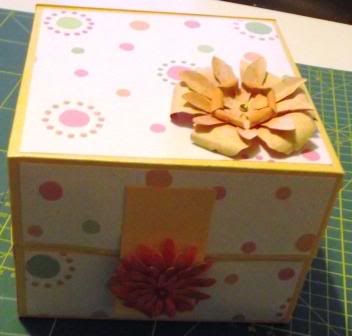
Hope you're having a lovely Easter holiday. Today I thought I would share with you a card box that I made. It doesn't have to be just for cards, but as I'm also a card maker I thought I'd focus on that. I just want to say thank you to Sheila for having me back again. This box will have enough room for cards that are 5 inches by 5 inches. well let's get started.So all you need is 3 12x12 pieces of plain card stock, 3 12 x 12 pieces of decorative paper or card stock, wet glue, a dry adhesive, ribbon, paperclips, flowers, hook and loop and a sakura clear stardust pen or glitter glue.
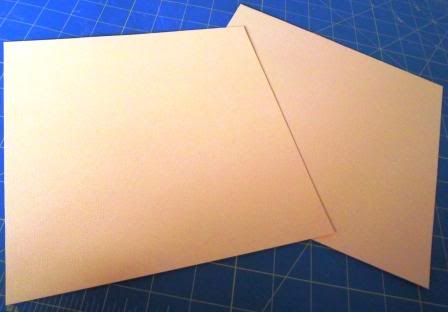
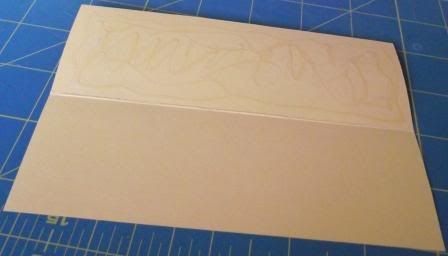
First cut two of the card stock to 9 1/2 inches x 9 1/2 inches
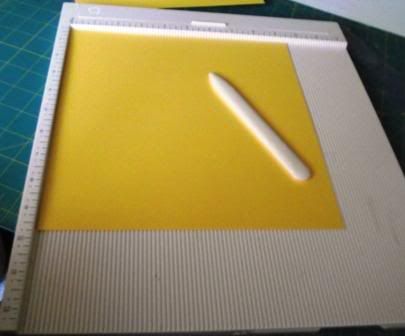
Score each of those card sheets on all sides at 2 inches. This will leave a square in the middle measuring 5 1/2 inches.
This is how each of those sheets should look.
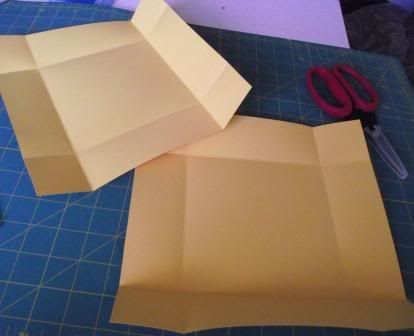
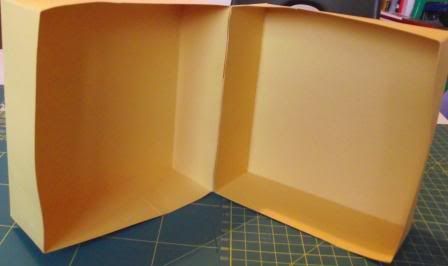
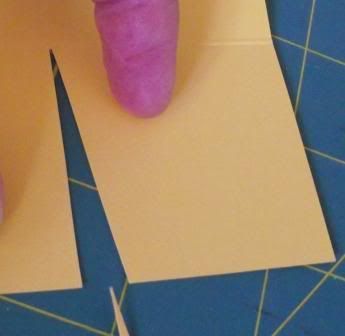 Let's make the flaps for the box. Now you need to cut on all four sides on both sheets. I cut on the line to where the two creases meet. I then cut to the right of the line to the point. This will ensure that when you fold the sides in glue they won't get caught on the bottom.
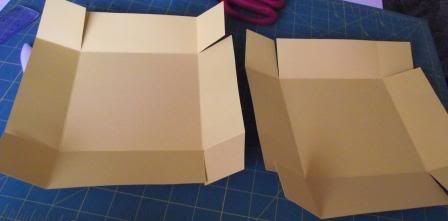
This is what both card sheets should look like.
 I used a wet adhesive for fixing the two boxes together, as I wanted them to be strong. Once glued to the side I then used paper clips to keep the side together whilst the glue dried.
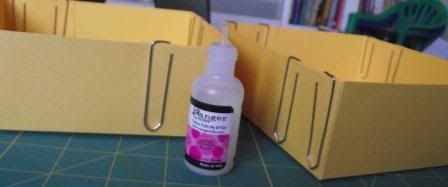
Here they are fixed together. I used Tim Holtz's glossy accents. It dries quickly and is very strong.
You now need to cut a piece of card 5 9/16 inches by 4 inches. Fold it at two inches so each half will be 5 9/16 by 2. Glue on one side. Stick this to one side of one of the boxes.fold it down and glue the other side and stick this to the side of the other box.
It will look like this. You've made a hinge for the box so it can open and shut but still be attached.
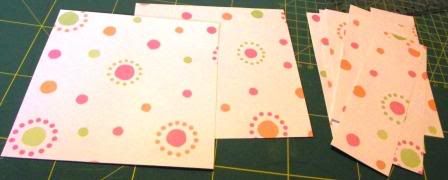 You now need to use your decorative paper. You need 8 pieces 1 3/4 inches by 5 1/4 inches and 2 pieces 5 1/4 inches by 5 1/4 inches. These you'll stick around the edges of your box and the top and bottom. I used my tape gun to stick them on.
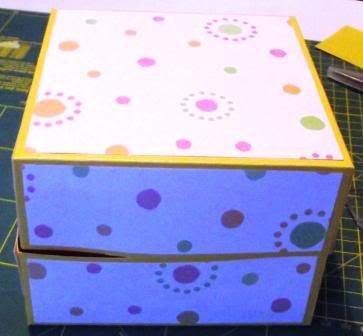 Here is the box with all of the papers on it.
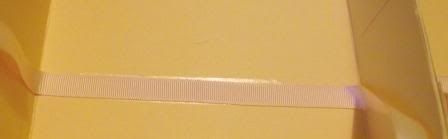
Now inside I wanted to use some ribbon to hold the cards in place on bothe sides. The ribbon was 27 1/2 inches long and you need 2 pieces of ribbon this length. I then put a line of tape in the bottom of the box and stuck the ribbon down. It doesn't matter if a bit of tape is still showing as we will be covering that later. To cover this you need two pieces of decorative papers 5 1/2 inches by 5 1/2 inces. You then stick these down. Make sure the ends of the ribbon are hanging over the sides so you don't glue the ends down under the paper.
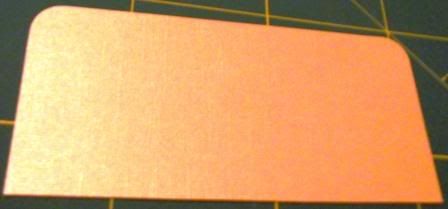
Right now we need to cover the inside of the boxes on the sides. We want to cover the flaps. So you need 7 pieces of cardstock 5 1/2 inches by 1 7/8 inches. Then you need one that is 5 1/2 by 2 1/2 inches. This one is longer as it will act as wedge, so the box shuts correctly. I rounded to of the corners. This needs to be stuck on one of the boxes on the side opposite where we stuck the outside hinge.
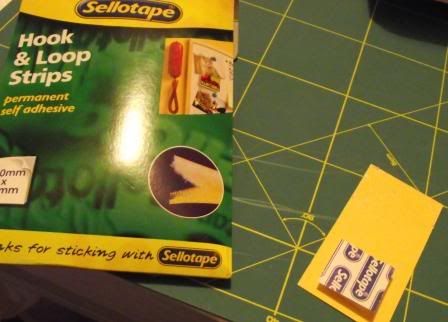
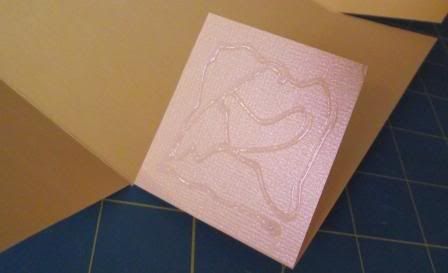
Once you've done that, we now need to think of the closure. I cut a piece of card 1 1/2 inches by 3 inches. I then stuck the hook and loop on one end. I then used wet glue to stick it on the outside of the box.

As you can see the hook and loop sticks to the box quite well.
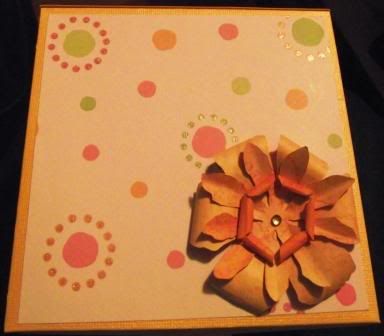
Now to finish the outside, I used some flowers I had made (It's one of my earlier tutorials).
I also used my sakura clear pen to add some glitter to the box. I used this pen as it dries quickly and I have control over where I put it. You could use glitter glue instead.
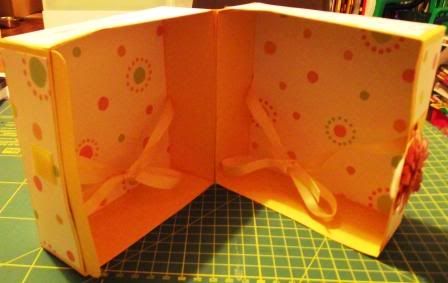 So here is the inside of the box. I tied the ribbon so you can see where the cards etc will go. I haven't made the cards yet that's another project.
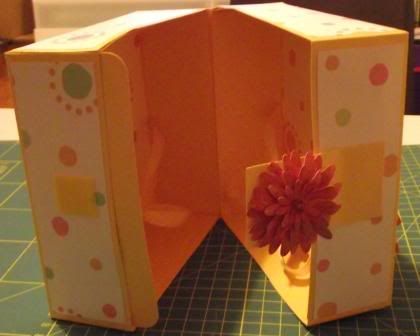
Here's another view with the closure which I put a flower on.
I hope you enjoyed this tutorial. This box could be used to house a mini album or have a mini album on one side and some keepsakes on the other. I'm sorry it's picture heavy, I must look into having a video camera.
See you next time.
Kelly x
I also used my sakura clear pen to add some glitter to the box. I used this pen as it dries quickly and I have control over where I put it. You could use glitter glue instead.
So here is the inside of the box. I tied the ribbon so you can see where the cards etc will go. I haven't made the cards yet that's another project.Here's another view with the closure which I put a flower on.
I hope you enjoyed this tutorial. This box could be used to house a mini album or have a mini album on one side and some keepsakes on the other. I'm sorry it's picture heavy, I must look into having a video camera.
See you next time.
Kelly x


9 comments:
Kelly this is a WONDERFUL box with a great tutorial that is easy to follow. I will have to try to make one of these! Love the colors you chose and that you even lined the cover! Thanks for sharing with us today.
This is super neat and I really like seeing things like this done from just regular papers...put them together and what do you get?
LOL!
Wonderfully done!
Happy Easter to you!
This is such a lovely little box and I think I can do this. TFS
Wow!! I love this beautiful box!!! You put together a fantastic tutorial too! Thanks so much!!
Ooooh, I just looooove boxes! You did a great job, it's very pretty; great tutorial too!
Thanks for the easy to follow tutorial! Great box and so pretty!
What a fun box...
I think u did a great job on this box. I love it. Easy to follow (and I sure need that-lol) plus u made it look fun!! Thanks so much for sharing this with us all. Happy Easter
Oh Kelly, I love your Card Box.....GREAT tutorial, I can't wait to try this......
TFS!!!!
Post a Comment