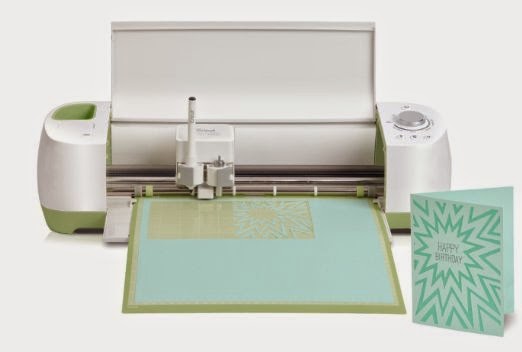
I have to admit, I'm a little slow. I have been hearing about Washi Tape for awhile, but did not jump on the wagon. My excuse: because I have to order everything. Recently, I was cruising on the net and found a tutorial on making your own Washi. I believe it is Jenny and you can find her tut here:
Well I never! There are some really cool tissue papers out there, making my tape was so much fun! I love the results! But, I had to put my own spin on this great technique. Enter the PC Imagine!
White tissue paper
Xyron 5" Creative Station
Xyron permanent or re-positional adhesive
Xyron permanent or re-positional adhesive
PC Imagine
Imagine Cartridge of Choice
Scotch Invisible Tape
Blue painter's tape
Brayer
Blue painter's tape
Brayer
- Cut your tissue paper into 4.5 x 10 1/2" strips.
- Carefully run through the Xyron Creative Station.
- Center between the marks.
- Apply slight pressure with fingers as the paper feeds.
- Brayer back of paper/Xyron
- Remove clear plastic from front.
- Adhere shiny side to mat. Position 1/4" from the edge of the mat (with the green arrow). Tape in position with Scotch tape at all corners and on leading edge of the mat. This allows the Imagine to read the PNC marks. As you can see, I used blue painter's tape along the entire lower edge.
- Select the Basic Shape rectangle, ratio of 1:2. Set the actual size to 4.5.
- Flood fill with pattern of choice.
- Select; Settings : Print Only
- Load mat into Imagine and print.
- Remove from mat. Trim to desired width. I used 1/2" for this card, but if I were to do it again, I would trim the tape to 1/4".
- Apply to your project! I found it was easier to peel the backing away as I applied it---fewer changes for the tape to adhere to itself.
So quick, so fun and adds so much to all your projects! Thanks for stopping by.....


10 comments:
What a beautiful card and such an interesting technique. Thanks for the great tutorial, I just love how this card turned out. Thanks for sharing today.
OMG! This is a great tutorial.
TFS,
Sandra
OMG! This is a great tutorial.
TFS,
Sandra
Wow how fun!!! Great tutorial!!!
Hugs,
M
Thanks for the Fabulous Tutorial!!!Thanks!
Awesome tutorial!! I had never heard of this and I (sad to say) rarely use my imagine. You have certainly inspired me to try this. Thank you!!
Great tutorial ... Thanks for sharing with us
Hugs
Adele
What an awesome project and tutorial!! This is great that we can make our own tape!! Love it!!!!
Awesome idea-love the tutorial:)
Sherrie K
http://sherriescraps.blogspot.com
Great tutorial and a great card!!!
Post a Comment