


Hi Crafty Friends, Adele here
Today is my turn to guest design here at She's A Sassy Lady
Thanks Sheila :)
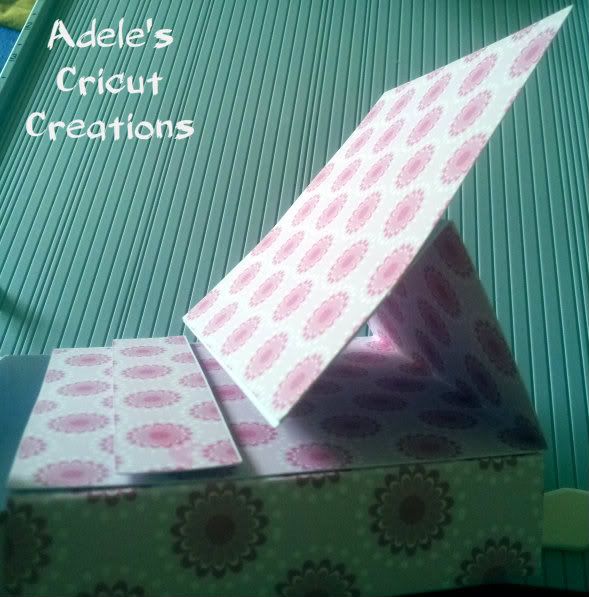
Today's project is an Easel Drawer Box, I made this design in CCR & on the Gypsy so for anyone that would like these files, I shall put them at the end of this post.
So, here is the Easel Drawer Box
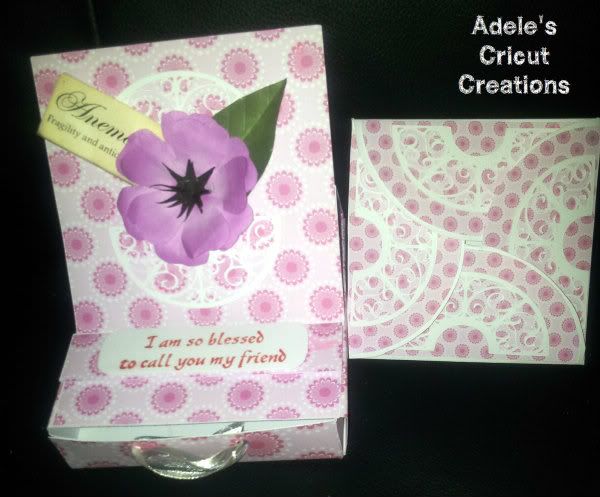
This includes a 4x4 square folded card to fit inside the drawer.
You will need the following card stock
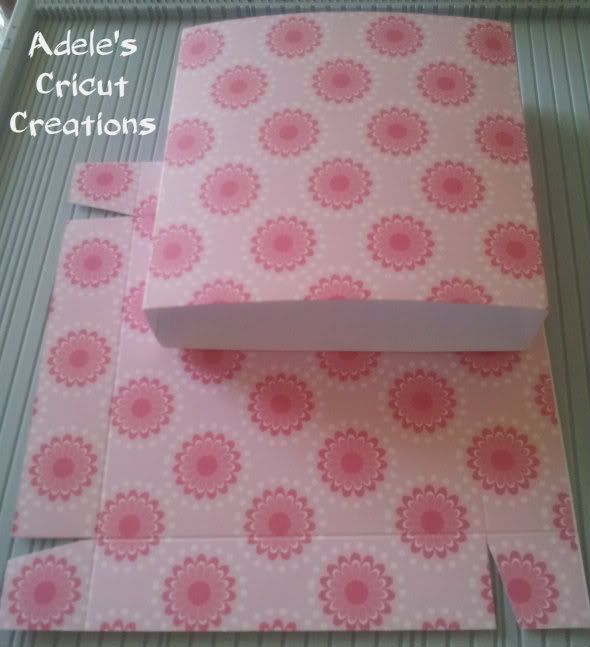
Drawer Box
6.5" x 6.5" for the drawer
4.5" x 12" for the wrap of the drawer
Score the drawer 6.5" square card at 1" around all 4 sides,
cut a small triangle into 4 edges to form the tabs, glue together.
Score the wrap 12" at the top, at the following marks on a score board
1.1/8", 5.5/8", 6.3/4", 11.2/8"
(If using a Crafters Companion Ultimate, then use the "box base" side to score the following)
Score at 1", fold then push this fold to the right edge and score again at 4.5", fold and push this fold to the right edge and score again at 1", fold push to right edge and score at 4.5", fold, push to right edge and score at 1"
This forms the wrap for around your drawer base
Now on to the Easel Card, for this card you will need the following card stock
Easel Card
4.5" x 9" for the card, score at 2.25" & 4.5"
4.5" x4.5" for the front panel
4.5" x 1" for the stopper bar.
I used Gypsy Wanderings, Ornamental Iron, George & All wrapped up for decoration and the semi circle panel pieces ( using the hide contour feature on Gypsy wanderings grapefruit)
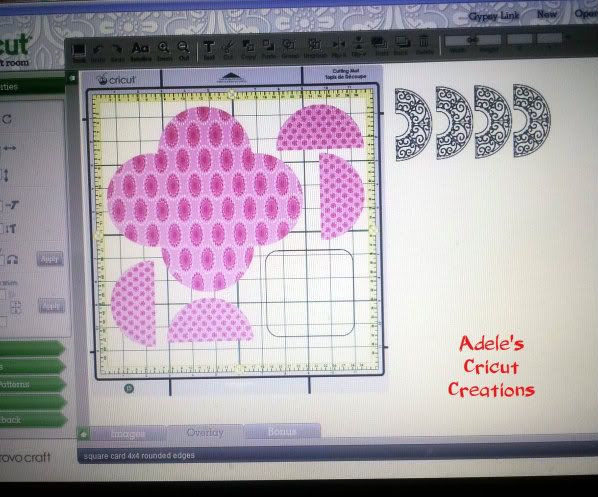
Here is the Gypsy view
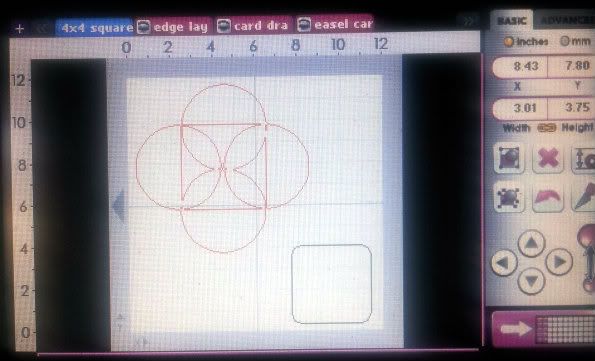
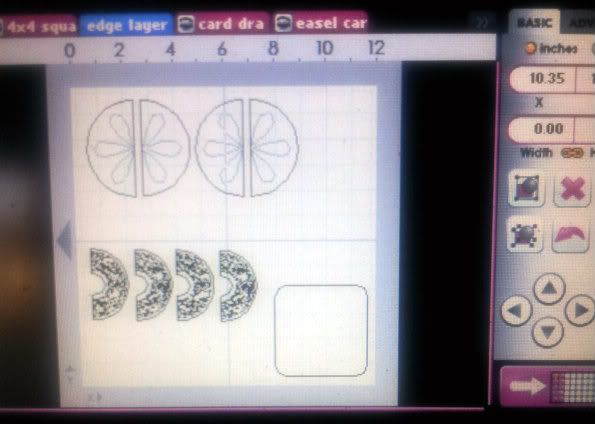
This is how the 4" x 4" card should look after adding the semi circle panels and the Ornamental Iron decorate pieces to the underside of the card.

And this is how it should look when folded

Now, on to assembling the Easel Card to the drawer box
With the 4.5" x 9" card attach it to the top of the drawer wrap and fold the easel part so you can attach the front easel panel, add the stopper bar too, as shown below.
Now it's ready to decorate :)
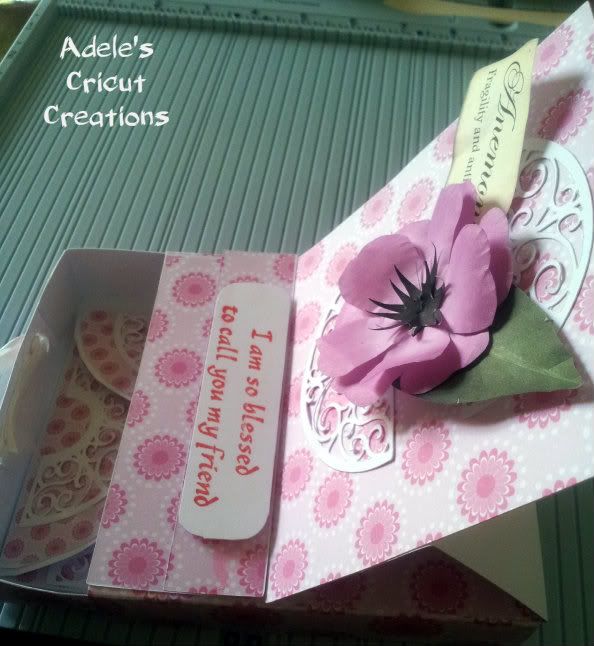
I have made several of these in various sizes, they are so handy for so many occasions, here is a few I have made recently, using Heartfelt Creation die's as well as my cricut.

Sorry for such a long post but I thought the detail would help others recreate these.
Here are the links to my files
Thank you so much for having me again Sheila.
I hope you enjoyed this project, I certainly had fun creating them :)
Happy Crafting
Hugs


10 comments:
This is so beautiful. Thank you for sharing this fun project with us.
Oh my goodness! This is just too pretty. Love it. Love the 4x4 card and now have to get ornamental iron! What a unique idea. Thanks for sharing with us today!
Wow!Love it!TFS Iam going to try and make one for my sister for Mother's Day!Beautiful!
So beautiful! TFS the files with us!
wow. This is beautiful and unique. TFS
Wow! Your easel cards are simply stunning!! Thanks for such a wonderful tutorial and the free files!! You are so kind!
Really great cards, someday I hope to have time to sit down and learn some of these techniques!!
Wow Adele! This is AMAZING! I just love every little detail and what a wonderful tutorial! YAY!
This was a great project. My daughter needed a card for a special teacher so I made one for her. Check out my results http://seaswancreations.blogspot.com/ Thanks again for a super project!
Wow, what a fab project!!! You really outdid yourself!!! Thanks for the tutorial and the files!
Post a Comment